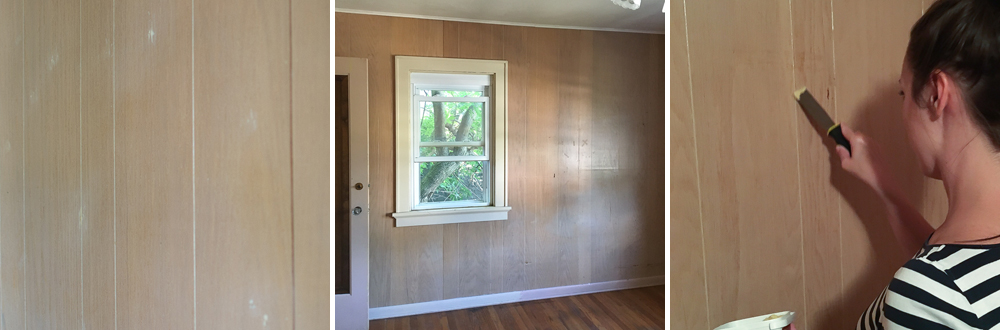
Owning a house with wood paneling wasn’t exactly on our must-have list, but we couldn’t be picky in Madison’s sellers’ market. As much as we hated the idea of having two bedrooms with paneling, we couldn’t let it deter us from purchasing this house. The house was listed below market value and if that meant we had to deal with outdated decor decisions, we’d figure it out!
It didn’t take long for us to start tackling the paneling. In fact, the bedroom that now serves as an office was the first room we started with. Admittedly, we would have taken down the paneling and started with fresh walls in an ideal world. However, we’re working with a 1920s house with plaster and oftentimes wood paneling was put up to conceal cracks and reinforce the walls, so we were worried about what we’d find underneath — and that was too overwhelming to think about in our first month of home ownership! So, we went with the next best thing: painting our wood paneling, ahem, “vertical shiplap.”
After doing two rooms, we can confidently say that painting wood paneling is really simple. However, it is time consuming. Be sure to allow yourself plenty of time to work on the project; the more time you spend with prep work and priming, the better your walls will look when you’re done. Ready to go for it? Here’s what you’ll need:
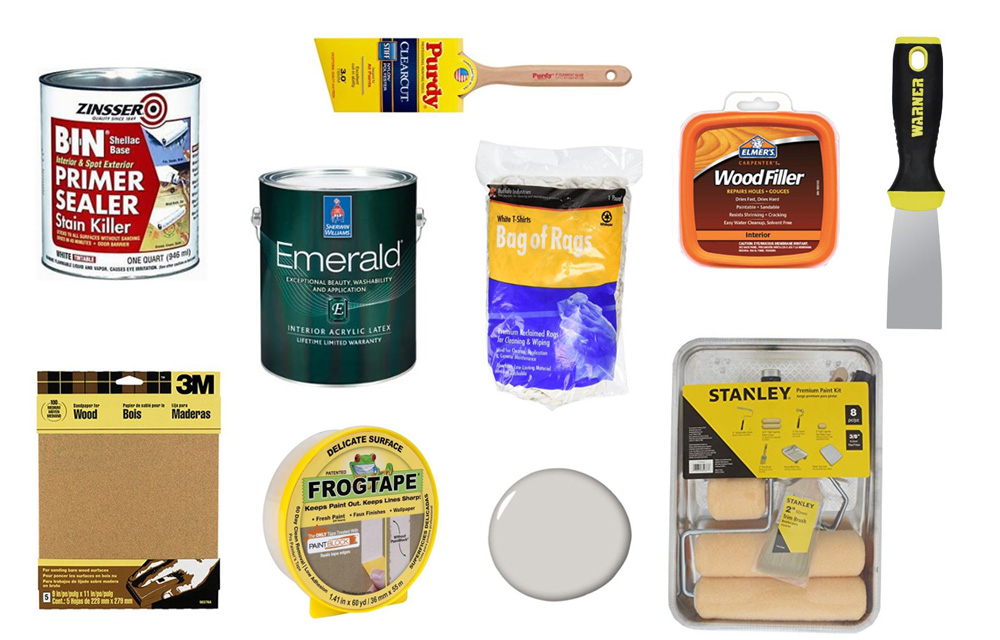
Wood filler | Putty knife | Sandpaper | Rags | Primer | Painter’s tape | Paint brush | Paint roller, covers, and tray | Paint
Now that you’ve assembled all of your materials, it’s time to get to work:
1 – Prep the walls: Before you even begin putting anything on the wall, you need to take everything off the wall. It sounds obvious, of course, but there was a section in our office where we missed some clear tape. After our first coat of paint, the tape bubbled up and we had to scrape it off and redo that section. The bedroom had more tape all over the walls and Dave spent two hours carefully combing the walls with a flashlight for any reflection of tape to scrape it off. Most of it came off with our fingers or a putty knife. The most stubborn pieces released with a bit of Goo Gone.
2 – Repair nail holes: Get out that wood filler and start filling all of the holes and imperfections in the paneling. After they dry, sand them so they’re flush with the wood paneling. As you’ll learn, the more you put into the pre-painting prep, the better the end result will be.
3 – Fill the grooves (if desired): If you’re not keen on the telltale joints of wood paneling, you can fill the grooves with joint compound. We didn’t do this actually because the hint of slats kind of grew on me and I liked the texture that it added to the room.
4 – Sand the paneling lightly: You don’t need to spend a lot of time sanding the wood, but you do want to dull the shiny finish to allow your paint to adhere more effectively.
5 – Clean the walls: Use a damp cloth to wipe away any dust left from sanding.
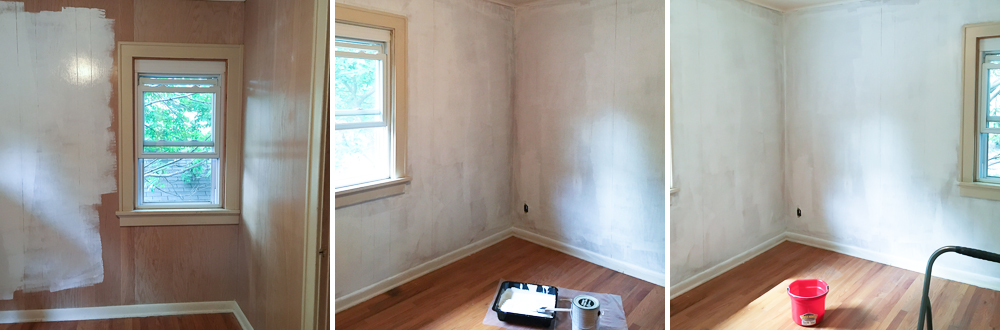
6 – Apply primer: Before you can add any color to the wall, you’ll need to apply a coat of stain-blocking primer. Take note of any stains that seep through when the primer is dry and go over those areas with another coat. We used this primer for our walls, but I’ve since heard that a shellac-based primer is even better for painting wood paneling. If we were to do it over, I’d opt for the latter. There’s a small section in each room where a stain keeps creeping through the finished coat of paint. We’re waiting to see where our furniture ends up before we buy the shellac-based primer and add more paint over that.
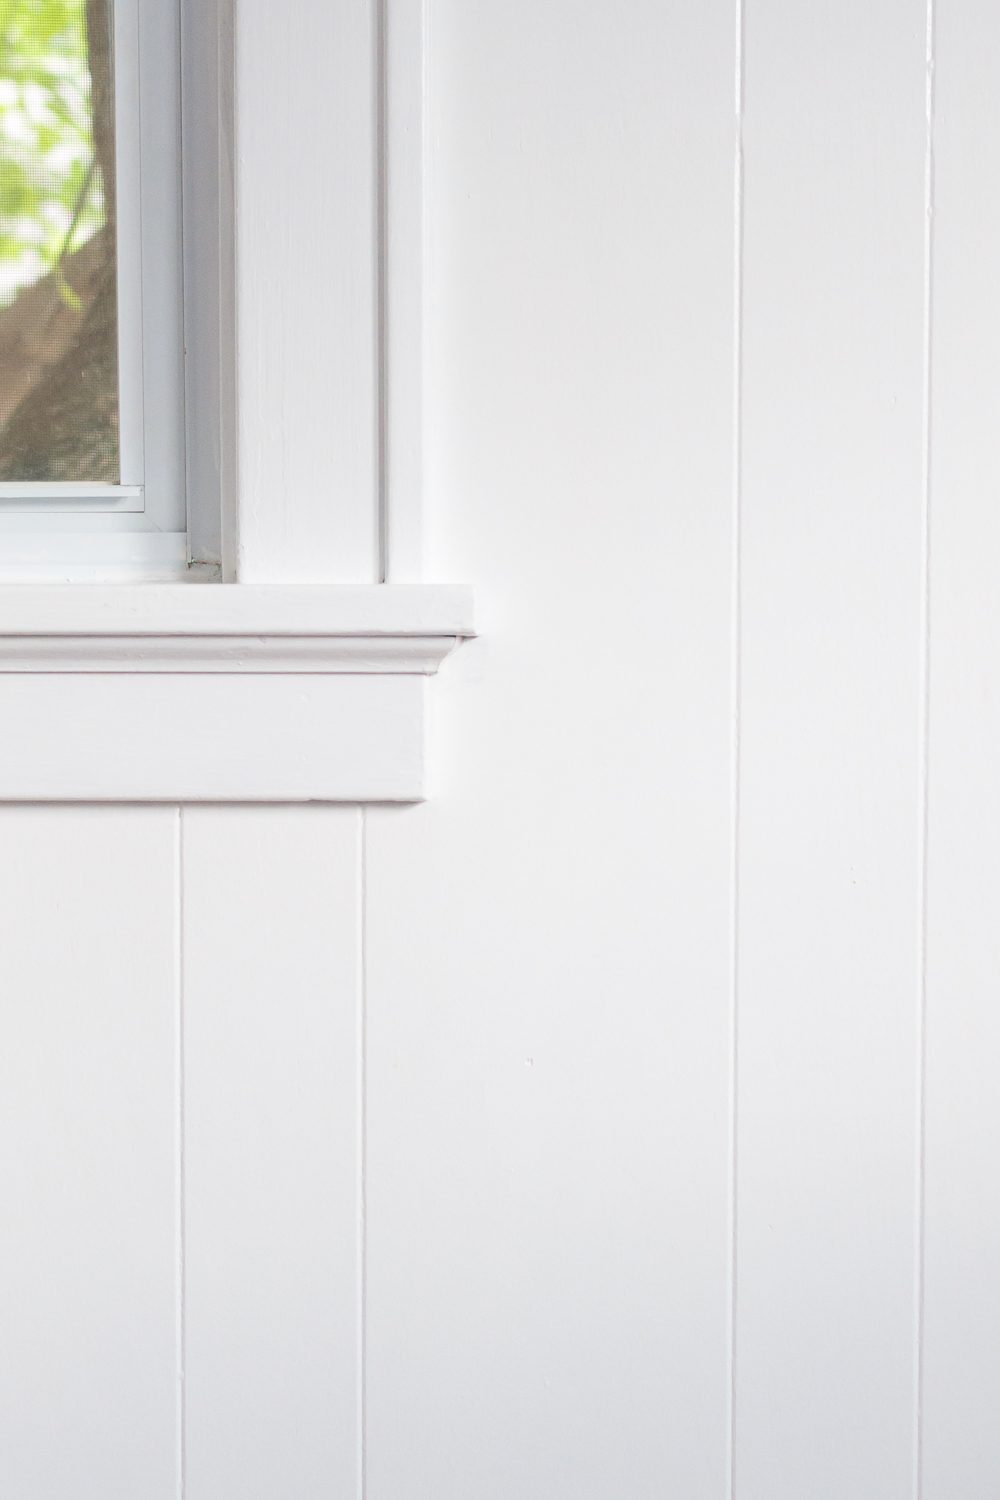
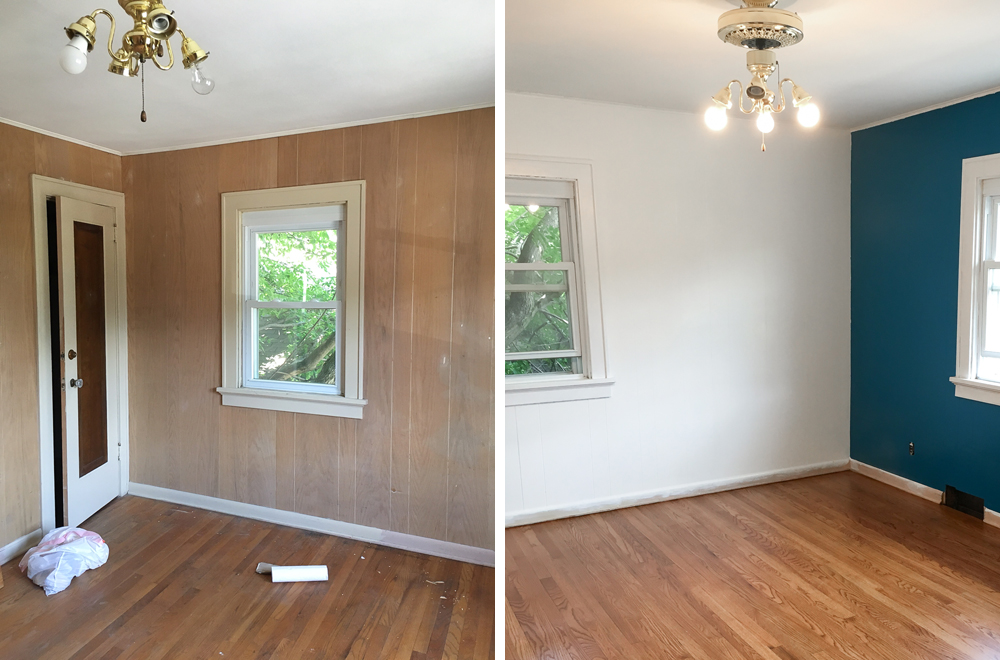
7 – Paint: It’s finally time to paint! I think wood paneling looks better with a semi-gloss finish rather than going with a satin or matte. Sure, any type of gloss shows imperfections more than a duller shine would, but I think the gloss also shows off the unique features of the wood and looks more luxe when it’s all done. It’s a matter of personal preference, of course. We did two coats of Sherwin Williams ‘Emerald’ interior acrylic latex paint in High Reflective White with a semi-gloss sheen. (The color looks a little green on my screen, but it’s actually the only true white the store carries. It’s the base color of all of the paint.) In the bedroom, we did an accent wall in Amalfi where our headboard is. I cut in the corners, ceiling, and baseboards with a brush and filled in the grooves between the wood slats. Dave then went over everything with a roller to smooth it out. We did two coats for the majority of the walls, but had to go over a few sections again where we could see hints of the wood coming through.
We’ve since painted the baseboards the same color and finish as the white walls.
We’re still on the lookout for a chic ceiling fan!
Pingback: Home Projects for the Next 6 Months()