Over the past year and a half, we’ve been tackling a lot of the household things we could do ourselves like painting, changing light fixtures and outlets, and other small projects. There are a handful of bigger things, though, that are too daunting for our skill set and we’re to the point where we’re ready to make some of those more impactful improvements. One of the things that bothered us so much that we decided to embark upon first was the hole between our master bedroom and guest room.
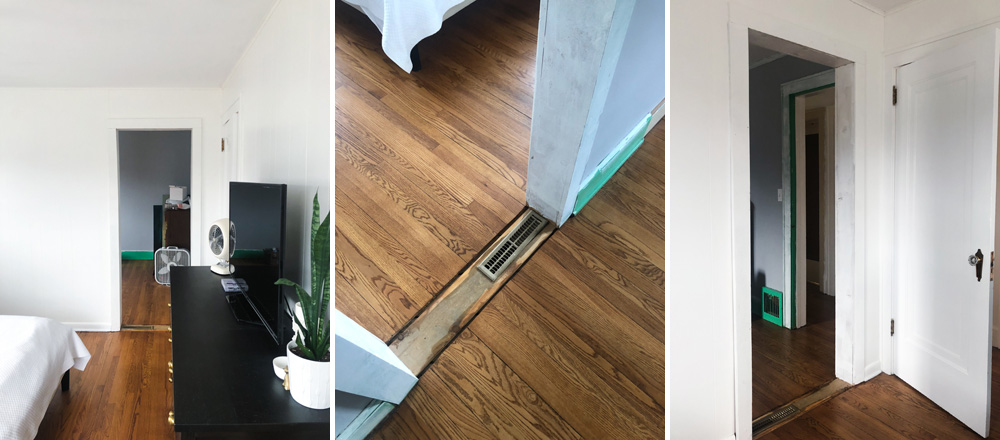
At some point in our house’s 90-year history, someone cut a doorway between two of the upstairs bedrooms. This was likely done when the house was a two-flat. There were kitchen cabinets in our guest room, and I’m fairly certain our bedroom was a living room. Since it’s just the two of us, it wasn’t the biggest deal for the first 18 months, but it was really annoying to wake up every morning to a project we’d have to deal with at some point. Making matters worse was that the heat vent, which undoubtedly faced our bedroom originally, was set in the floor between these rooms. It’s fine when it’s temperate outside, but it’s obnoxious in the winter. You can get a feel for what we were working with below:
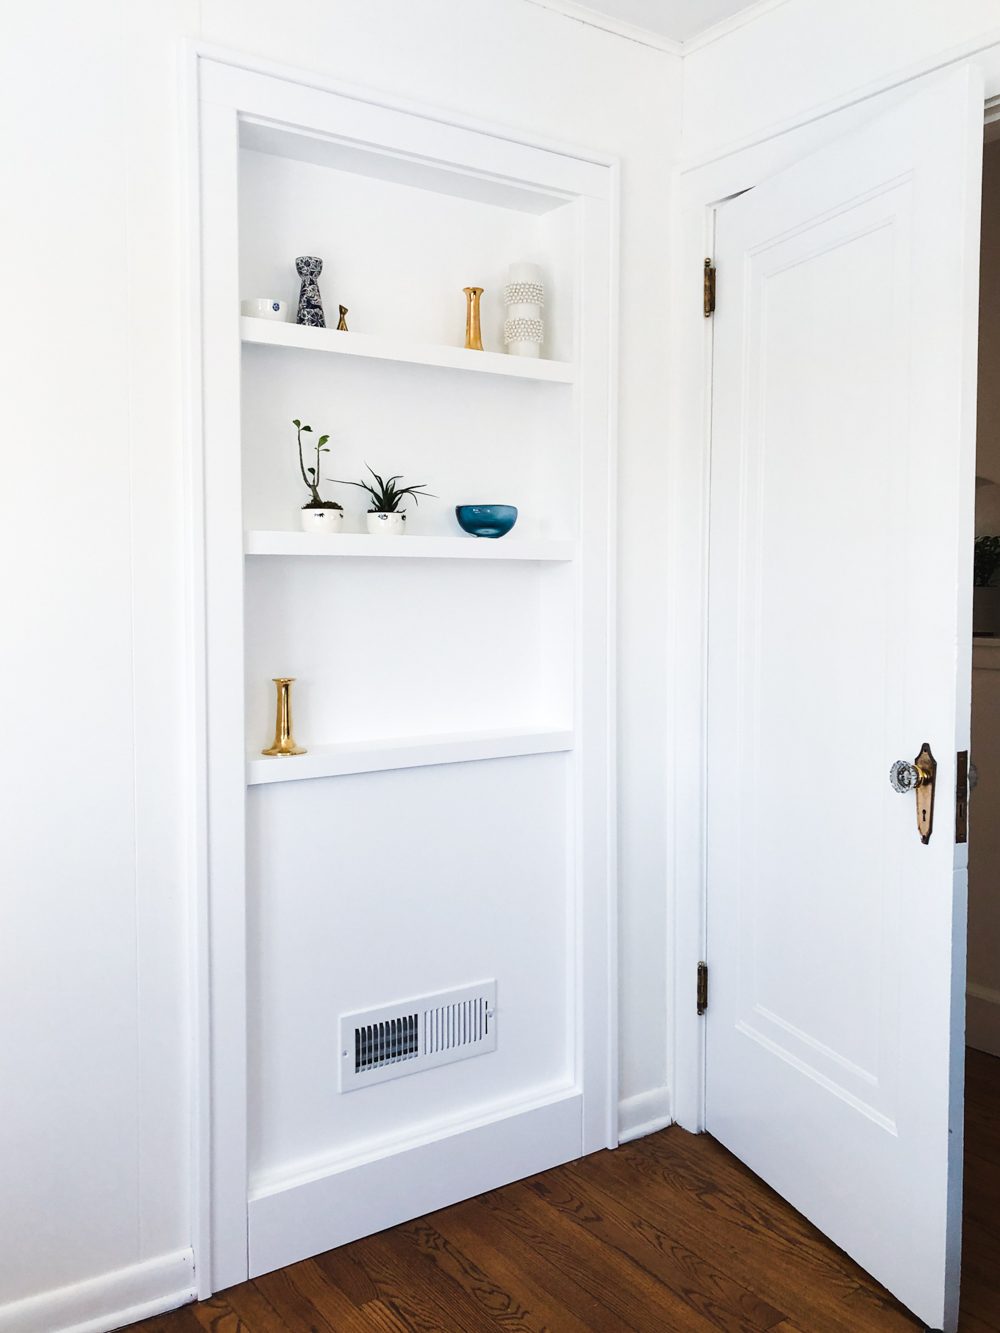
We thought about just finishing the wall on either side of the two rooms, but the paneling in our bedroom would be a challenge to match with the wood grain and joints. It would have doable, of course — and as our carpenter reminded us, everything is doable with enough money. Instead, we came up with a design solution to add character to the space that felt appropriate for the 1920s home and opted for a shallow built-in cabinet. Unlike a traditional built-in shelf, this one could only be five inches deep due to the depth of the wall, so anything we display will need to be skinny. We also needed to find a solution to add a register to the bottom portion since that was on the floor between the two rooms and needed to face the master bedroom. It was important to me that the trim around the built-in match the window and door casings in the home. Here’s what our carpenter came up with:
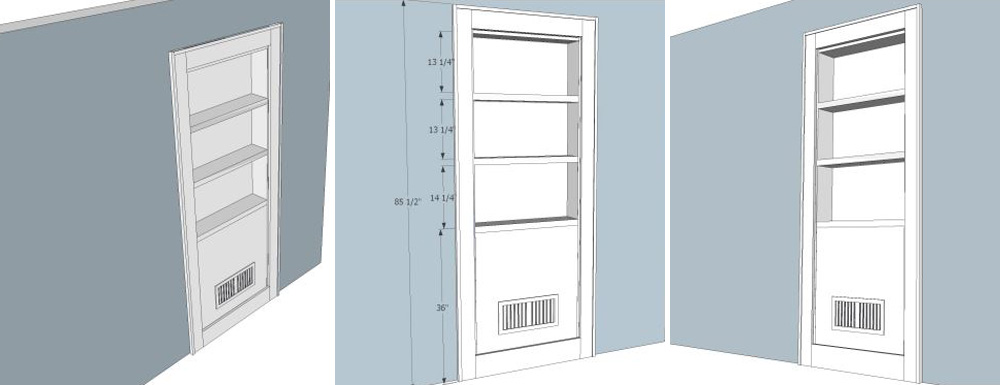
The only change I requested was that the top piece of wood extend to each side so the seam between the horizontal and vertical pieces was running horizontally. It’s annoyingly picky, but that’s how the rest of the windows and doors were done in the house and I knew it would bother me if it were different.
We actually ended up getting two quotes on the project. The first person wasn’t able to provide renderings or a sketch. That’s not to say that he wasn’t capable of executing the project and understood what I wanted, but now that I’ve worked with someone who is able to provide this type of visual reassurance that we’re on the same page, I’m going to expect that of any person working on our house in the future. It helps to address any concerns up front so there are no surprises.
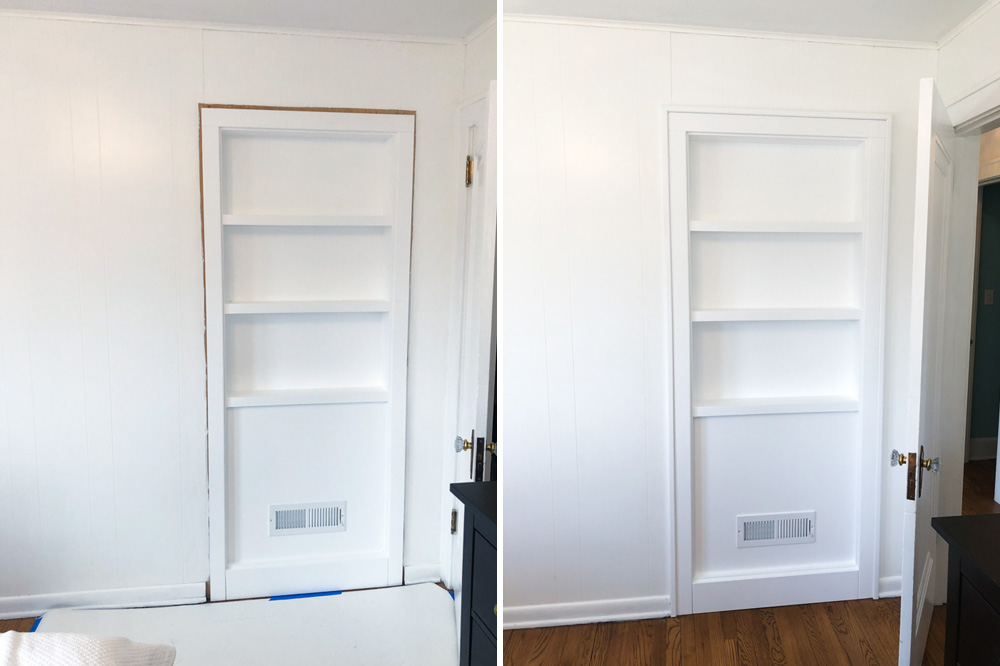
The carpenters crafted the built-in off site, and we had them paint it for us. It cost an additional $300 to have it sprayed with lacquer, but it was worth every penny to have such a smooth, flawless finish. Also worth nothing is that we went with fixed shelves rather than adjustable ones, which allowed for a lip that extends down to be added to the front of the shelves. This created extra stability to guard against any shelves bowing in the future. It also helped with mounting drywall on the other side of the wall. Our house is plaster, but no one is fixing walls with lath and plaster anymore, so the mudding was blended to match the plaster in the guest room. We also had our carpenter match and fill in the original baseboards that were missing in the guest room, and do some baseboard and crown molding restoration in our dining room. It definitely wasn’t cheap when it was all said and done, but I can’t express how happy I am with how everything turned out. (If you’re in Madison and need a carpenter, let me know and I’ll pass along the info!)
We still need to put some thought into styling the shelves. For now, we just added some of the smaller items we’ve collected over the years. If you’re curious about any of the items in that first photo, here’s the info: